Dental implants have revolutionized the way we replace missing teeth. With proper planning and execution, they offer excellent long-term success. However, like any mechanical system, implants can occasionally face complications. One situation clinicians may encounter is- loosening or fracture of an implant abutment screw.
Although it may initially seem alarming, a fractured abutment screw does not necessarily mean the implant has failed. In many cases, the screw fragment can be retrieved safely with the right technique and instruments.
Why Do Abutment Screws Loosen or Fracture?
Implant abutment screws are designed to withstand significant functional forces. Factors which may lead to loosening or eventual fracture:
1)Inadequate torque during placement
2)Occlusal overload
3)Poor implant–abutment fit
4)Parafunctional habits such as bruxism
5)Repeated screw loosening causing metal fatigue
Over time, these factors can weaken the screw and lead to fracture within the implant.
How Do You Recognize the Problem?
Patients may report that their implant crown feels loose or unstable while chewing. Sometimes they may simply notice a slight movement in the prosthesis.
Clinically, you might observe:
1)Mobility of the implant crown
2)Difficulty tightening the prosthesis
3)Occlusal discomfort
4)Radiographic evidence of a separated screw fragment
Once confirmed, the next step is careful retrieval of the remaining screw fragment.
Armamentarium Needed:
Having the right instruments makes the procedure much easier. Commonly used tools include:
1)Implant screw retrieval kit
2)Ultrasonic scaler with fine tips
3)Dental explorer or probe
4)Round or carbide bur
5)High-speed handpiece
6)Magnification (loupes or microscope)
7)Micro forceps or endodontic files
Step-by-Step Method for Screw Retrieval:
1. Careful Assessment
Begin with a thorough clinical and radiographic evaluation to determine the position of the fractured screw fragment.
2. Remove the Prosthesis
The crown or prosthetic component should be removed to allow clear access to the implant platform.
3. Visualize the Screw Fragment
Good lighting and magnification are extremely helpful at this stage. Clear visualization helps prevent damage to the implant threads.
4. Attempt Gentle Counter-Clockwise Rotation
Often, fractured screws lose their preload and are not tightly engaged. Using a sharp explorer, ultrasonic tip, or a fine endodontic file, gently attempt to rotate the fragment in a counter-clockwise direction.
5. Use a Retrieval Kit
If the fragment does not move easily, a manufacturer-specific screw retrieval kit can be used. These kits contain specially designed instruments that engage the broken screw and help remove it safely.
6. Create a Small Slot (If Necessary)
In some cases, a tiny slot can be prepared on the surface of the screw using a small bur. This allows a flat driver to engage the fragment and unscrew it.
7. Ultrasonic Assistance
Ultrasonic vibration may help loosen the fragment by disrupting the mechanical binding between the screw and implant.
8. Inspect the Implant
Once the screw fragment is removed, the internal implant threads should be carefully examined and cleaned to ensure there is no debris or damage.
9. Place a New Screw
A new abutment screw should be inserted and tightened according to the manufacturer’s recommended torque value.
10. Reinstall the Prosthesis
Finally, the prosthesis can be repositioned and secured after confirming the stability of the new screw.
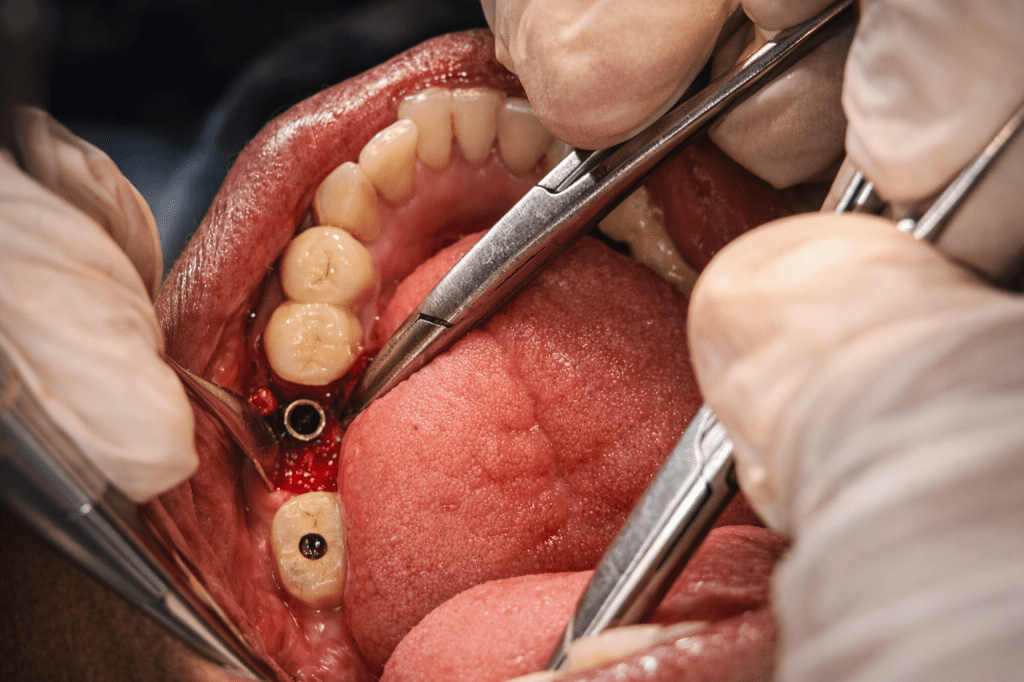
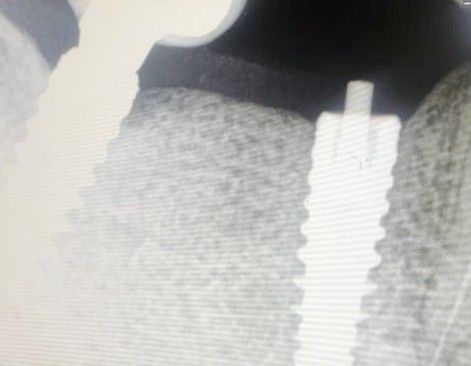
The clinical case which is illustrated in this blog post ,the abutment screw fracture happened inrt 46.Implant placement was done inrt 46 47 around 3 years ago and individual implant crowns (FP1) were placed .The patient reported with Dislodged implant crown inrt 46 .Radigraphic examination shows abutment screw fractured and lodged within the implant fixture.
Treatment planning included careful retrieval of abutment screw after mid crestal incision and flap elevation followed by retrieval using engaging the visible screw tip with artery forcep with firm press and anticlockwise rotation to disengage the screw from the fixture.This was followed by placing of healing abutment inrt 46 and suturing and follow up after 1 week for suture removal.
Practical Tips for Clinicians:
-Always work under magnification and proper illumination
-Apply minimal force to protect the implant threads
-Use manufacturer-specific retrieval kits when available
-Take your time—patience often makes the difference
Preventing Future Screw Complications:
Prevention is always better than repair. The following steps can help reduce the risk of screw loosening or fracture:
1)Following correct torque protocols
2)Designing proper occlusion
3)Applying principles of implant-protected occlusion
4)Scheduling regular follow-ups for maintenance
Final Thoughts~
A fractured implant abutment screw can feel like a frustrating complication, but in most cases it is manageable with careful technique and the right instruments. With proper diagnosis and a systematic retrieval approach, the implant itself can often be preserved, allowing the prosthesis to continue functioning successfully for years.
#abutmentscrew #dentalimplants #implantology #prosthodontics #prosthodontist #screwretrieval #techniques #principles #implantfailure #handytips