Welcome to an exciting exploration of one of the most innovative modifications in functional orthodontics! As orthodontic students, mastering the nuances of appliance design and modification is crucial for your future success. Today, we’re diving deep into the groundbreaking Twin Block advancement modification developed by Carmichael, Banks, and Chadwick – a system that has transformed how we approach Class II treatment with enhanced precision and patient comfort.
🎯 Why This Modification Matters for Your Future Practice
The Twin Block appliance, introduced by Clark in 1982, has become one of the most popular functional appliances in the United Kingdom and is arguably the most successful in treating Class II division 1 malocclusions. However, the original design had significant limitations that this modification brilliantly addresses.
The Problem with Traditional Twin Block Reactivation 🚫
- Inconvenient chairside acrylic additions
- Unpleasant taste and smell for patients
- Inaccuracy due to polymerization shrinkage
- Time-consuming laboratory modifications
- Limited ability to make small, gradual adjustments
Understanding the Core Principle
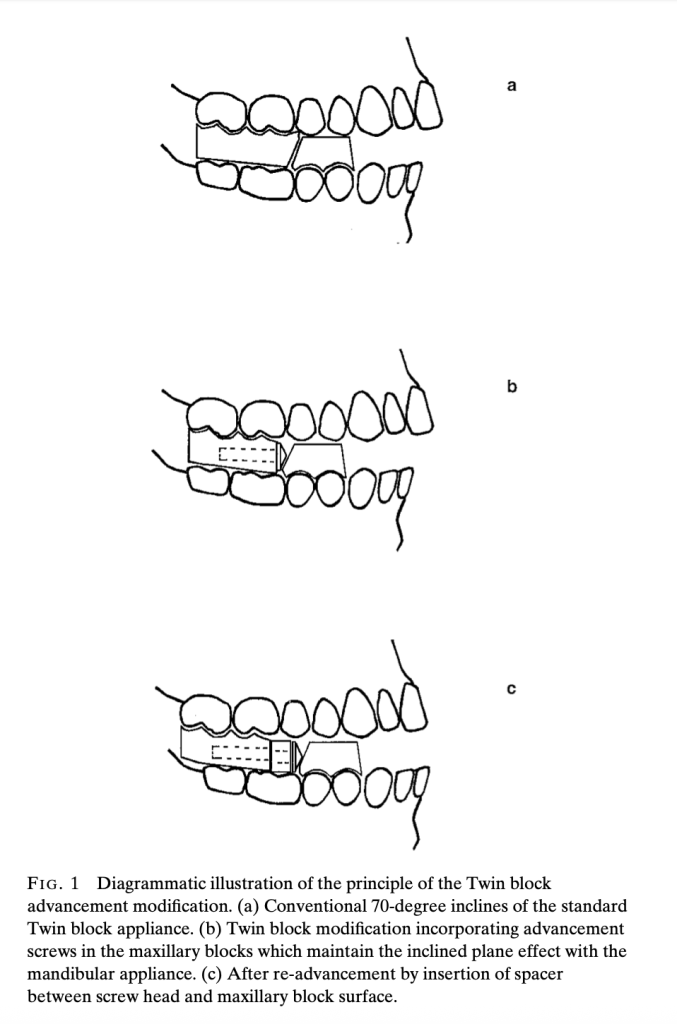
The modification incorporates stainless steel screws with conical heads into the upper appliance blocks, maintaining the crucial 70-degree inclined plane effect regardless of screw rotation. This ingenious design allows for controlled, measurable advancement using polyacetal spacers.
Technical Specifications: What You Need to Know
| Component | Specification | Clinical Purpose |
|---|---|---|
| Stainless Steel Screws | 3mm diameter, 18/8 M3 grade | Provide structural strength and stability |
| Screw140° included angle (70° working angle) | Maintain 70° inclined plane regardless of rotation | |
| Screw Lengths | 12mm and 16mm (longer for >5mm advancement) | Accommodate various advancement needs |
| Spacers Material | Polyacetal co-polymer resin | Enable precise, measurable advancement |
| Spacer Lengths | 1mm, 2mm, 3mm, 4mm, 5mm | Allow stepwise progression (2-3mm typical) |
| Spacer Diameter | 6mm diameter | Ensure proper fit and function |
| Thread Housing | Injection-molded acetal resin with lateral tags | Prevent fractures and ensure consistent fit |
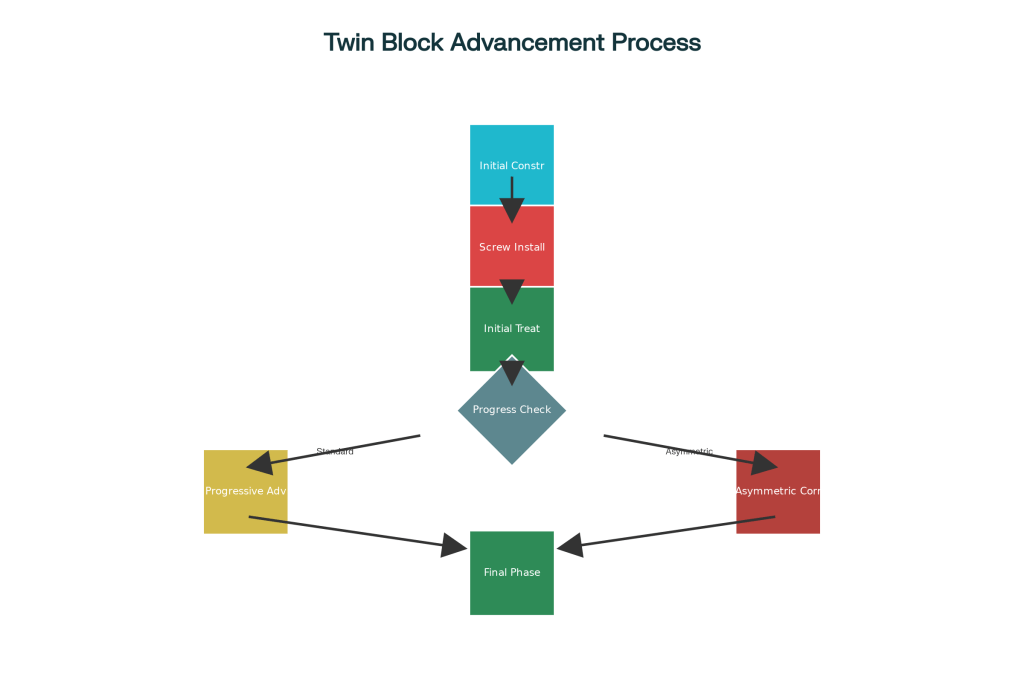
The treatment process follows a logical, patient-friendly progression that maximizes compliance and comfort while achieving optimal results.
Phase 1: Initial Construction and Setup
- Bite Registration: Take protrusive wax bite with comfortable advancement (may be as little as 2-3mm in some patients)
- Screw Installation: Insert 3mm diameter stainless steel screws with 140° conical heads into upper blocks
- Initial Delivery: Begin treatment with screws inserted without any spacers
Phase 2: Progressive Advancement
- Monitoring: Assess overjet reduction at each visit
- Advancement: Add 1-5mm polyacetal spacers between screw heads and blocks
- Typical Increments: 2-3mm per advancement visit
- Maximum Advancement: Up to 9mm using longer 16mm screws

🎭 Clinical Scenarios: Real-World Applications
Scenario 1: The Dolichofacial Challenge 😰
Patient: 12-year-old female with long face pattern
- Challenge: Weak craniomandibular musculature, poor tolerance for large protrusions
- Traditional Problem: Patient bites blocks together instead of maintaining protrusive position
- Modified Solution: Start with minimal 2mm advancement, progress gradually with 1-2mm spacers
- Outcome: Improved compliance and comfort, successful Class II correction
Scenario 2: The Large Overjet Case 📏
Patient: 13-year-old male with 12mm overjet
- Challenge: Requires significant mandibular advancement but limited initial tolerance
- Traditional Problem: Would require multiple appliance remakes or uncomfortable large advances
- Modified Solution: Begin with comfortable 3mm advancement, systematically add spacers over 6 months
- Outcome: Achieved 9mm total advancement with excellent patient acceptance
Scenario 3: The Asymmetric Correction 🎯
Patient: 11-year-old with Class II and dental centerline deviation
- Challenge: Need for different advancement amounts on each side
- Traditional Problem: Difficult to achieve asymmetric correction with conventional methods
- Modified Solution: Use different spacer lengths – 3mm right side, 5mm left side
- Outcome: Successful centerline correction along with Class II improvement
Scenario 4: The Class III Application 🔄
Patient: 10-year-old with developing Class III malocclusion
- Challenge: Requires gradual reactivation for optimal growth modification
- Modified Solution: Incorporate screws into maxillary appliance for controlled reactivation
- Advantage: Small increments reduce patient discomfort and improve compliance
🎨 Material Science: Understanding Polyacetal Resin
Why Polyacetal is Perfect for This Application:
- Strength: 10 times stronger than conventional acrylic resin
- Safety: Non-toxic and non-allergenic properties
- Durability: High resistance to surface wear and low water absorption
- Workability: Can be trimmed and polished with standard dental instruments
- Biocompatibility: Proven safe for intraoral use over extended periods
🎯 Facial Pattern Considerations: Tailored Treatment Approaches
| Facial Pattern | Characteristics | Treatment Considerations | Recommended Approach |
|---|---|---|---|
| Dolichofacial (Long Face) | Weak craniomandibular musculature | Less tolerance for large protrusions, gradual advancement essential | Start with 2-3mm advancement, progress gradually |
| Brachyfacial (Short Face) | Deep overbites present | Overbite reduction more problematic due to reduced block trimming | Use Phase 1 appliance or plan fixed appliances to follow |
| Mesofacial (Average) | Balanced growth pattern | Standard advancement protocol works well | Standard 2-3mm increments per visit |
| Class III Cases | Requires gradual reactivation | Small increments of reactivation necessary | Utilize modification for controlled gradual advancement |
💡 Clinical Tips for Success
For Dolichofacial Patients 📐
- Start conservatively with minimal advancement
- Monitor for tendency to bite blocks together
- Consider Phase 1 appliance for overbite reduction
- Emphasize proper appliance positioning during sleep
For Brachyfacial Patients 🔽
- Plan for overbite management strategies:
- Option 1: Use initial upper removable appliance (Phase 1)
- Option 2: Gradual Twin Block wear reduction during retention
- Option 3: Upper removable retainer with anterior inclined bite plane
General Clinical Guidelines 📋
- Advancement Frequency: Every 3-4 weeks based on patient adaptation
- Typical Increments: 2-3mm spacers for most patients
- Maximum Achievement: Up to 9mm total advancement reported
- Block Height Requirement: Minimum 6mm between second premolars
⚠️ Troubleshooting Common Issues
Problem: Block Cracking After Advancement 🔧
Cause: Inadequate block height or retrospective screw insertion
Prevention: Ensure adequate 6mm block height, incorporate screws during initial construction
Solution: Use screw thread housing system for reinforcement
Problem: Difficulty Removing Screws 🔄
Cause: Direct screw insertion into acrylic creating tight fit
Solution: Use screw thread housing to facilitate easy removal and adjustment
Problem: Screw Alignment Issues 📏
Cause: Manual positioning without proper guides
Solution: Use alignment rods during construction for precise positioning
SPOTIFY LINK: https://open.spotify.com/episode/3Nrv4Z2HB1AWzmvTphGnb5?si=BvSquCggS2CPKQggskdNrQ

